Today we are going to discuss about a completely new software that is User friendly, Time saving, effort free and has wide range of features and compatibility. It is the “Fast File Search” utility for Windows 8. Yes, as the name suggests, now you can find files on your system within no time irrespective of your Hard disk Storage Size. This software is designed in such a way that it will not only save your time but also will surprise you with its amazing search results. This is designed keeping all the aspects of a User who wish to find his/her files on the system. The “Fast File Search” utility has a wide range of customizable options. The Screenshot below gives you the picture of how the software looks like when you launch it.
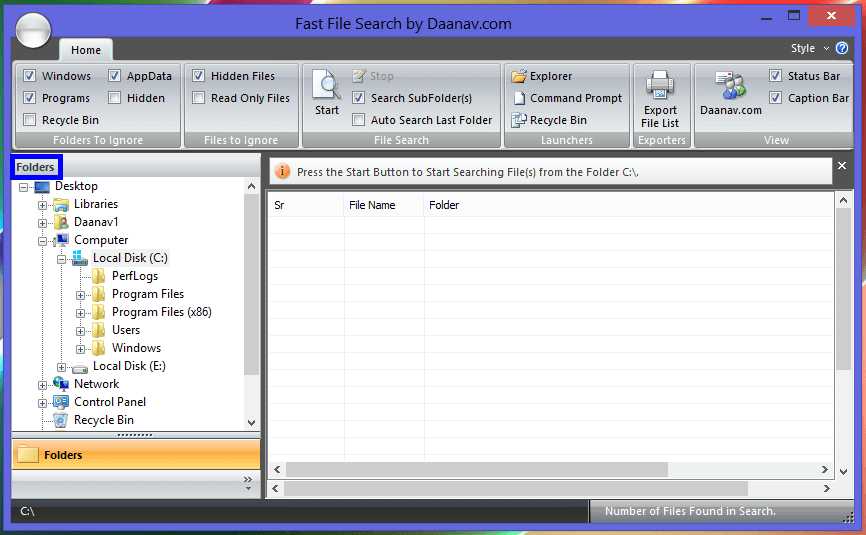
Fast File Search utility in Windows 8
1) This post will help you to understand all the different features of “Fast File Search” and How to use it as per your convenience. To begin with the file search, you need to click on the Start button of the Fast File Search Utility as shown in the screenshot below. When you click on the Start Button, a search window pop-up appears on your screen displaying search parameters like “Search Word” and “Search Path”. Type in the partial or full file name and click on OK. The “Search Path” by default will display on which drive or folder your are currently on. To change it, you need to select the drive or folder from the “Folders” List marked in Blue on the left hand side of the Fast File Search utility in the Screenshot Above.
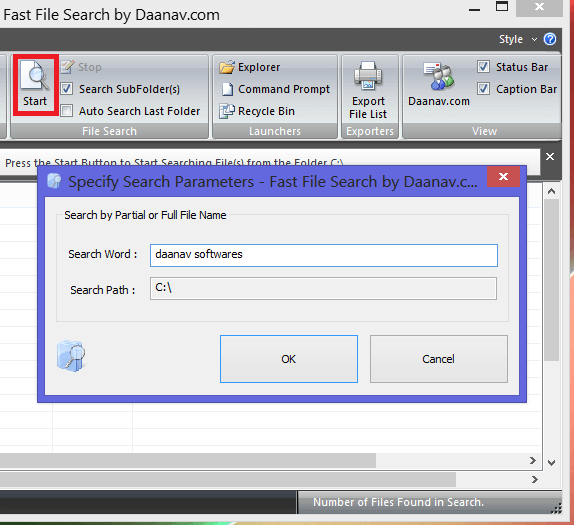
Start button and its search window of Fast File Search in Windows 8
2) Once you click on “OK” button after typing in the file name, the “Fast File Search” utility searches the file within no time with all the search details such as Start time, Stop time, No. of parsed folders, No. of Ignored folders, etc in the Status Bar. When you Right Click on the searched file, a drop down menu appears where you will see different options such as “View Selected File”, “Open File’s Folder”, “Locate file in Explorer”, “Send File to Recycle Bin”, “File properties” and “Folder properties”. The screen shot below displays how it looks when you right click on the searched file in “Fast File Search”.
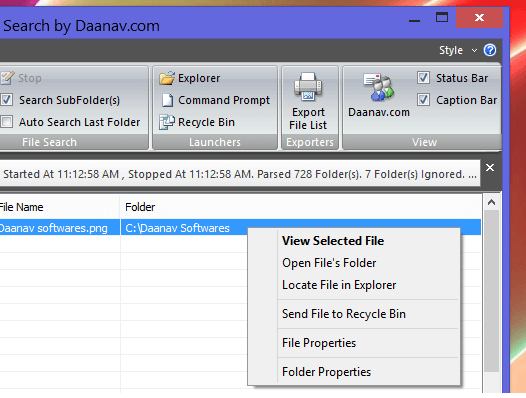
Search result and file right click of Fast file search in Windows 8
3) Now let us discuss about the customization that you need to do while searching a file using “Fast File Search” utility in Windows 8. The screenshot given below will help you to understand different customization options. One of the option is been marked in Red color which comes in the category of “Folders to Ignore”. This category in “Fast File Search” is only applicable to the Drive where the Microsoft Windows Operating System is Installed i.e its only applicable when you are searching for a file in the drive (example C: or D:) wherever OS is installed. This “Folders to Ignore” category helps you to check or uncheck the folders that you need to ignore while searching a particular file. Next to “Folders to Ignore” is the category named “Files to Ignore”, which helps to ignore the files that you don’t want this utility to search for. Others Categories are “File Search”, “Launchers”, “Exporters” and “View”. If you move your mouse cursor over the options displayed in categories of this “fast File Search” utility, then you see a pop-up message giving you a brief idea about the function of that particular button or option. In the Screenshot below it is giving a pop-up of the Start Menu.
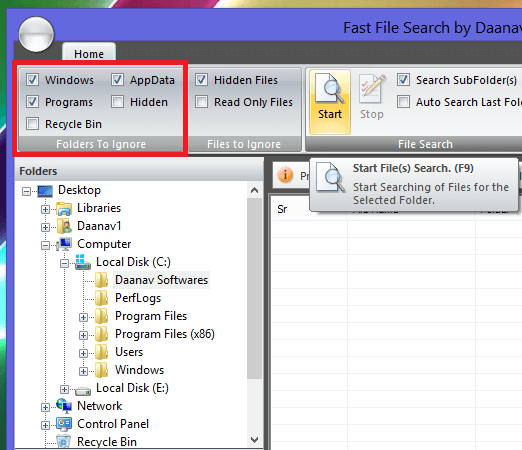
Customizable Options of Fast File Search in Windows 8
4)When you click on the file, its details are displayed in the “Status Bar” and “Caption Bar” and their displaying areas are marked by Red and Blue respectively in the screenshot given below. To know about this software, you need to click on the Question Mark sign just above the status bar.
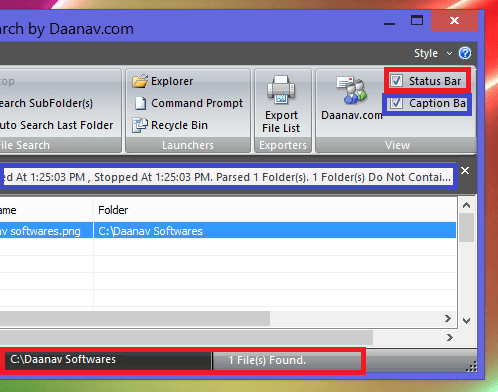
File details of Fast File Search in Windows 8
5) Other interesting option in this “Fast File Search” utility is the Theme changing Option. You will find this “Style” Key in the Top Right Corner of “Fast File Search” window and also a Circular Button in the Top Left Corner just above the Home key that has the same functionality. Click on any of them to switch between the different Default themes. This “Fast File Search” utility is compatible with other versions of Windows such as Windows 7, Windows Vista, Windows 8, etc.