Now filling Data in Web Pages or Web Forms is really easy to do. Text Data from .csv Files or from .txt files can now be typed onto active application window. Automating Filling of Online Web Form is done by the software presented here with the help of Keyboard Automation. Yes all you need to do is create a simple script and let the Software Type Data in Online Web Forms and submit it as a Human would do.
Fill Online Web Forms Automatically
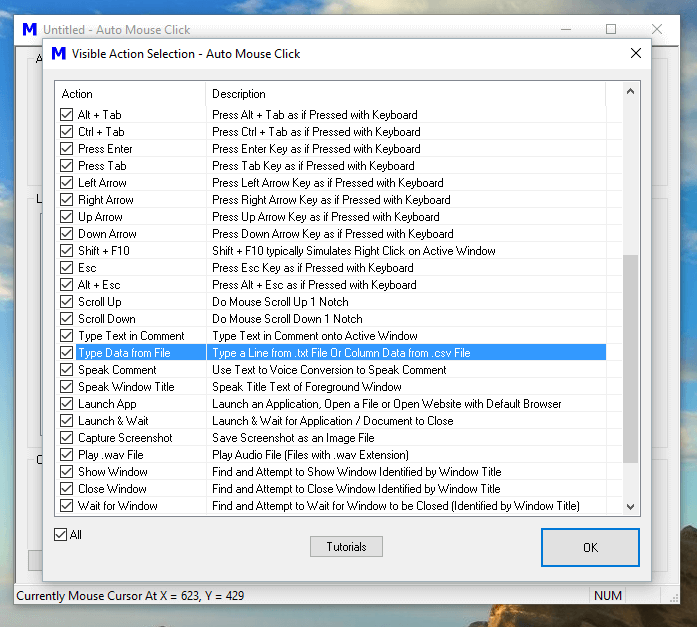
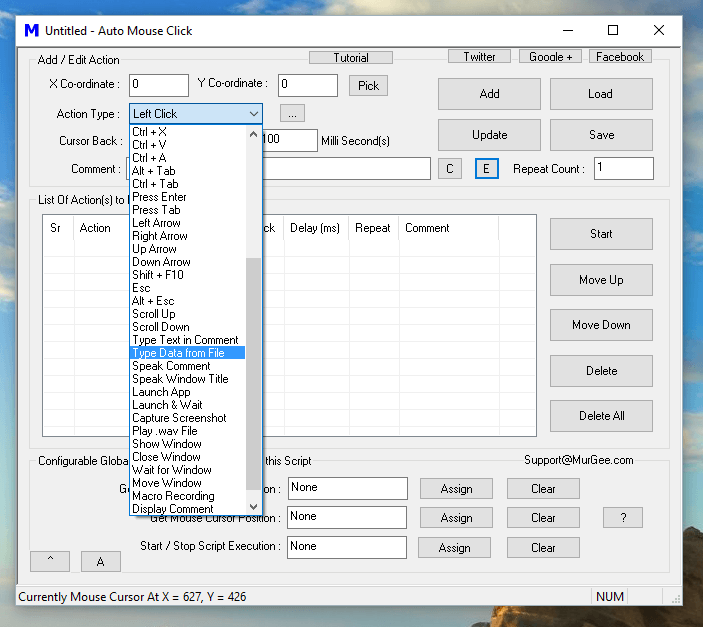
The Type data from File Action can read Unicode .txt or .csv files. When Filling Forms using .txt Files, this Windows Automation Software reads the Text File, Line by Line and types onto Active Application Window. On the other hand .csv files are specially designed Comma Separated Values which allow easy management of Text Data in Row and Column Format. With the help of Type Data from File Action in Auto Mouse Click Application, you can create a script to read CSV File on a Column by Column basis from .csv file and Fill Online Web Form easily. The .CSV Files are text files and can be opened with the help of Microsoft Excel, Notepad or any other Text Editor Application.
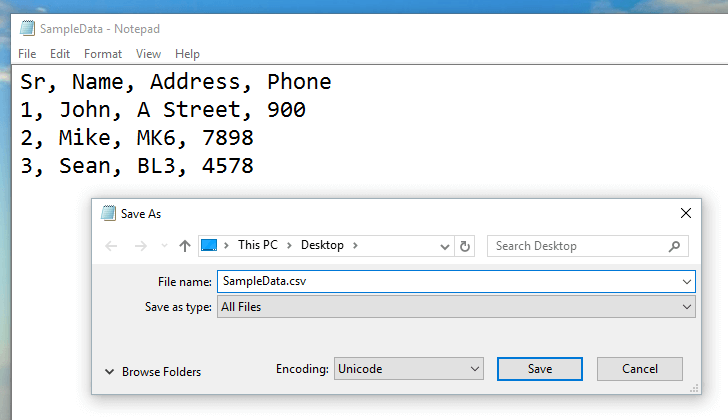
CSV Data in Unicode Format for filling Online Forms Automatically
The above Screenshot displays a Unicode CSV File which contains 3 Rows of Data and 1 Header Column. This Windows Automation Software reads all rows and header column as well for automated typing. In case your Data to be filled is in a File on a Line by Line basis, you can instruct the software to read from Unicode .txt File. Unicode Files have been implemented for Automated Form Filling as they can contain Non-English Characters as well.
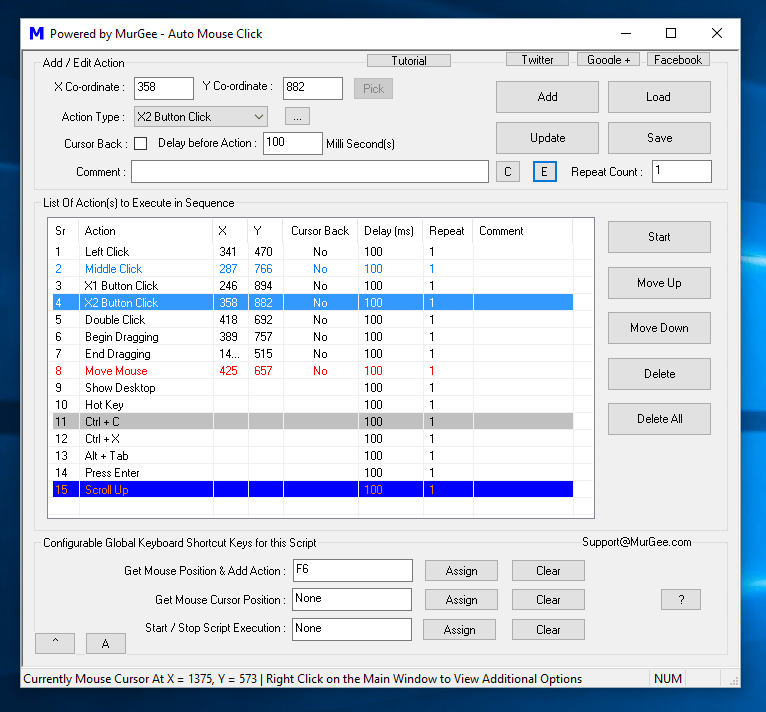
Windows Automation Software to do Automated Text Typing for Filling Online Web Pages
Filling Online Forms with Automated Text Typing is now easy to implement. Download the Free trial of this Windows Automation Software to Fill Online Web Forms with the help of Automated Text Typing. Creating Scripts is easy and requires no programming knowledge. Yes there are lots of video tutorials available to assist you in getting started with this Windows Automation Software. Apart from Filling Web forms, Automated Website browsing, you can do Automated Mouse Clicking and much more to Automate Repetitive Tasks,