Windows 8 Speech Recognition

Windows 8 does has inbuilt speech recognition software functionality. In order to use the speech recognition functionality of Windows 8, all you need is a microphone apart from a Windows 8 computer. The Speech Recognition of Windows 8 works to provide text input and commands to active window applications. The Application(s) themselves do not understand whether the input to them was provided by a speech command or other sort of input to the application. You can type text into notepad or any other text editor with Windows 8 Speech Recognition, however accuracy is the most important thing when converting speech to text with Windows 8 Speech Recognition functionality.

Windows 8 Speech Recognition

Windows 8 Speech Recognition

In order to start the Windows 8 Speech Recognition functionality, use the Windows Key + Q Shortcut key Combination and type Speech as displayed below. You can alternatively search for Speech Recognition in the Windows Control Panel or even create a desktop shortcut to launch the Speech Recognition functionality. The Configuration Settings of the Windows 8 Speech Recognition functionality also allows you to launch the Windows 8 Speech Recognition at Computer Start-up  The Windows 8 Speech Recognition Tutorial will start automatically the first time you start the Speech Recognition functionality of Windows 8 and the guided steps will tell you all about Windows 8 Speech Recognition, will ask you to speak some words / command and it should not take more than a couple of minutes to complete the Windows 8 Speech Recognition Tutorial.
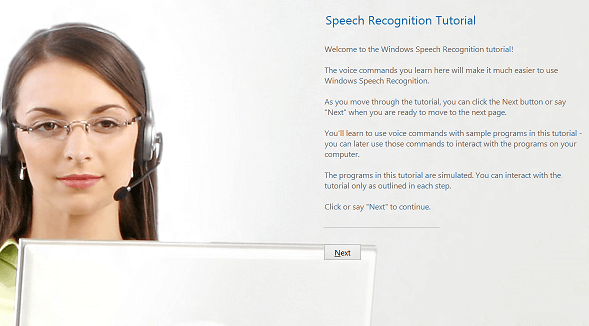
Windows 8 Speech Recognition Tutorial

Windows 8 Speech Recognition Tutorial

Once you are done with the tutorial and basic configuration steps of the Speech Recognition functionality of Windows 8, you should be able to see a Speech Recognition bar at the top of the screen. This Speech Recognition will indicate the input speech volume and will indicate whether the speech recognition is turned on or off and will indicate whether your speech has been recognized by the computer or not.

Windows 8 Speech Listener

Windows 8 Speech Listener

The screenshot above displays the Windows 8 Speech Recognition Bar at the top center and listening to speech input to the computer using Microphone. Now a days webcams do have inbuilt microphone and they can be connected to a windows computer using a single USB cable without the need of external power supply to the webcam / microphone. A Right click on the Windows 8 Speech Recognition bar will display configurable properties of Windows 8 Speech Recognition functionality where you can edit lots of configurations and improve accuracy of your speech to text conversion.
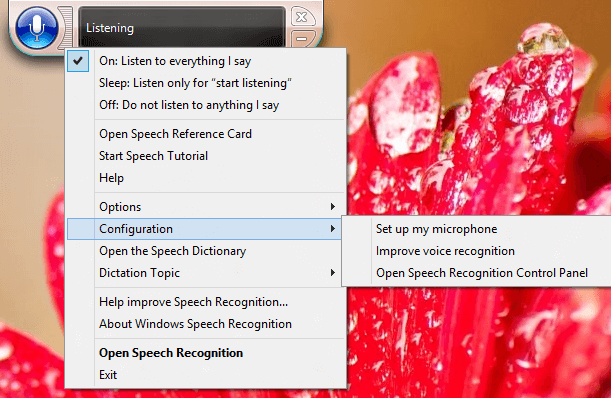
Windows 8 Speech Recognition Settings

Windows 8 Speech Recognition Settings

Little bit of patience is required to understand the functionality of Speech Recognition and once you have trained your computer to understand your voice, your Windows 8 computer can work as you say. This Speech Recognition functionality of Windows 8 offers lots of configurable settings and it is worth giving a try.
Notification Area Icons of Windows 8

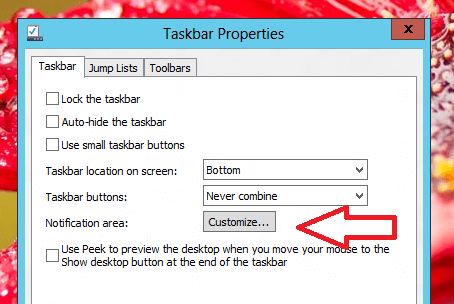
Notification Area Icon of Windows 8 are at the extreme right corner of the Windows 8 Taskbar . Apart from various other features the Taskbar of Windows 8 provides, it also provides configurable Notification Area. The Icons in Notification Area contain System Tray Icons and most of the time they do provide information tooltip and a content menu. By default Windows 8 adds System Tray icons like Speaker Icon, Network Icon, Icon indicating PC issues, etc. Many applications add icons to System tray so as to save the space in Taskbar. The configuration of the Notification Area Icons in Windows 8 can be done using Taskbar Properties as displayed below.

Windows 8 Taskbar Properties to Configure Notification Area Icons

Windows 8 Taskbar Properties to Configure Notification Area Icons

You can even launch the Notification Area Icon configuration Settings using Windows 8 search functionality. Just press Windows Key + Q and Search for Notification Area and click on the Settings as displayed in the screenshot below.

Notification Area Icon Settings from Windows 8 Search

Notification Area Icon Settings from Windows 8 Search

Both methods described above will open up a Control Panel Applet to configure Notification Area Icons. There are many configurable settings for the Notification Area as displayed in the screenshot below. In case you do not run many applications simultaneously, you can check the option to display all System Tray Icons so that you can visually see what applications are running and you can launch them easily.


Configure Notification Area Icons of Windows 8

Configure Notification Area Icons of Windows 8

Look closely at the above screenshot and notice that the checkbox Always show all icons and notifications on the taskbar is checked. Once this option is enabled, you will be able to view all the System Tray Icons of Windows 8 and interact with them using Right Click on any of the System Tray Icon. In case you do run lots of applications which create lots of icons in the Notification Area, you can uncheck the option to show all the icons and selectively choose which icon and notification you wish to see.

Video App of Windows 8

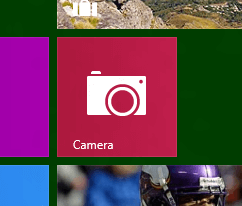
Windows 8 includes a Video App which can be used to Record and Playback Video and take Still Images. In order to use your Webcam or Camera connected to your Windows 8 Computer, navigate to the Start Menu of Windows 8 and look for the Camera Icon. You can alternatively, press Ctrl + Q and then search for the word Camera to quickly navigate to the Camera App of Windows 8. The given below screenshot of the Camera Icon was taken from a Windows 8 computer.

Camera in Start Menu of Windows 8

Camera in Start Menu of Windows 8

In case you have still not connected a webcam / camera to your computer, the Camera App of Windows 8 will ask you to connect a camera. Once you do have connected a camera / webcam to your Windows 8 computer, the Video App will display LIVE data from the camera in video mode. You can switch between video mode and camera mode using the icon at the bottom corner of the Camera App. Mouse Click can be used to Start / Stop Video Recording and even to capture still photographs from the Webcam / Camera connected to your Windows 8 Computer.

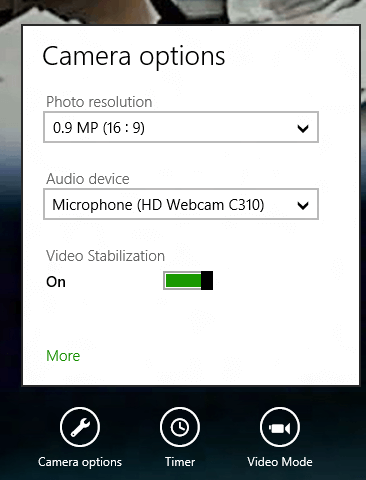
Camera Options of Video App in Windows 8

Camera Options of Video App in Windows 8

Given above are the basic configurable options of the Video App in Windows 8. Note that there is a link with text More in the Camera Options for configuring advanced camera options. In case you do have multiple audio devices connected to your Windows 8 computer, you can switch between them in the Camera App of Window 8. In the screenshots captured above, a webcam with inbuilt microphone has been used.

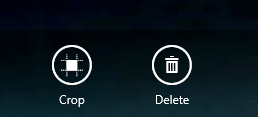
Crop and Delete Options in Camera App of Windows 8

Crop and Delete Options in Camera App of Windows 8

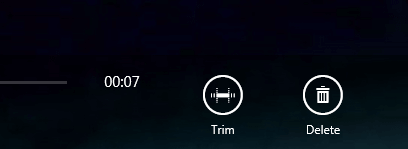
Once you have recorded video or captured images from the connected camera, you can do basic editing. Remember that the Mouse Clicks were used to start / stop the video recording in the Camera App of Windows 8 and Mouse Clicks were used to capture Still Snapshots. Navigating to the recorded media, can be done using the left arrow visible at the bottom left corner of the screen. While playing the video, basic editing options are provided by the Camera App of Windows 8 as displayed in the screenshot given below (Trim and Delete Options in Camera App of Windows 8)  and similarly while viewing snapshots captured, basic image editing features are made available by the Camera App of Windows 8 as displayed above (Crop and Delete in Camera App of Windows 8).

Trim and Delete Options in Video App of Windows 8

Trim and Delete Options in Video App of Windows 8

The Camera App is really a basic Camera App provided by Microsoft so that it can be used by everybody. Whether you are using Laptop with built in camera to capture Videos or Images or using a webcam or even a camera, this Video App is sufficient for capturing videos and images. The Author has still to figure out where does the Camera App stores the recorded media. Even with No Camera Connected, you can view the recorded media with the Camera App of Windows 8.

Jump List in Windows 8

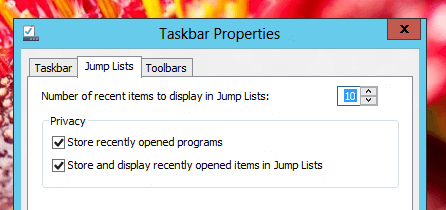
Windows 8 has a useful feature known as JumpList. Yes Windows 7 had this JumpList feature as well. JumpList are shortcut ways of opening documents in specific applications. Various Applications display Jump List and many applications do not disp-lay Jump List. Apart from Application controlled, the Jump List do have few configurations available from the Taskbar properties. You can invoke Jump List by doing a right click on any application’s icon in Taskbar.

Jump List Configuration in Windows 8

Jump List Configuration in Windows 8

There are many Windows Applications which do not display Jump List. Examples of applications which do not display Jump List are Calculator, Command Prompt, Registry Editor, etc. Given below screenshot displays how does the Jump List appears when it has no Jump List to display.

No Jump List in Software Application

No Jump List in Software Application

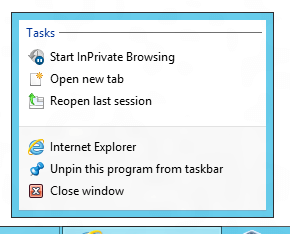
Implementation of Jump List is governed by Applications themselves. Different Applications implement Jump List differently, let’s for an example, the Jump List of Internet Explorer displays tasks as displayed below, whereas the Jump List of Google Chrome displays different categories for the Jump List items. On the other hand Windows Explorer display recently visited folder locations and so on.

Jump List Tasks of Internet Explorer 10 Installed on Windows 8

Jump List Tasks of Internet Explorer 10 Installed on Windows 8

To know whether your favorite application supports Jump List, Right Click on any Icon on the Task Bar and check how does this useful way of opening documents in appropriate applications. There are even Custom Jump List Software Utilities which allow you to create your own Jump List to quickly launch applications or opening documents on your Windows 8 Computer.

Magnify Screen in Windows 8

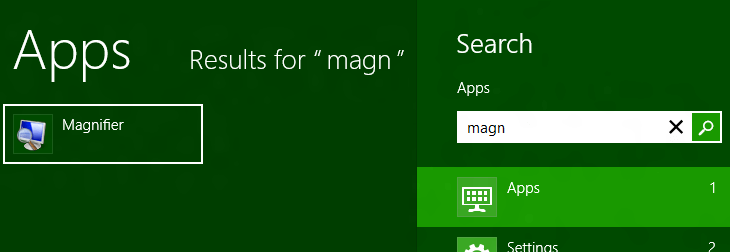
In order to magnify screen contents, you have multiple options depending on what you want to magnify. In case you would like to magnify and concentrate on specific portion of Windows 8, you can use the inbuilt Magnifier of Windows 8. However if you would like to magnify only your browser contents to browse websites, there is an alternative option. Let’s start with magnifying whole desktop or application and let the desktop display only a portion of the whole desktop. In order to launch the Magnifier, press the keyboard shortcut Windows Key + Q key in order to search for the Magnifier tool. When the search box appears type in Magnifier and the Windows 8 search will display you the Magnifier tool as displayed in the screenshot below.

Magnify and See portion of Magnified Screen Ares with Magnifier of Windows 8

Magnify and See portion of Magnified Screen Ares with Magnifier of Windows 8

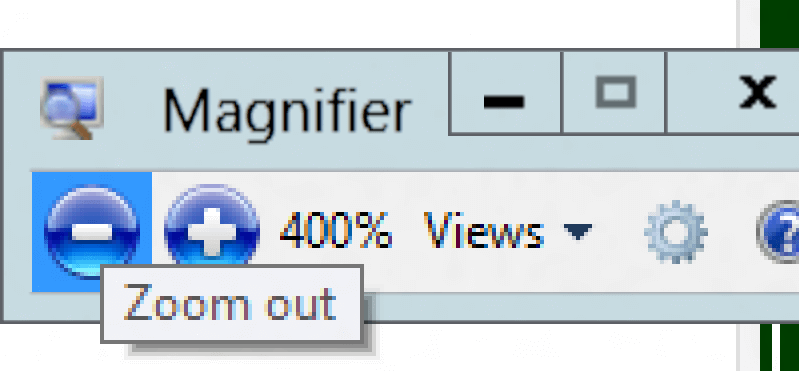
Once you have located the Magnifier, you can either click on it or press the Enter Key on Keyboard to Launch the Magnifier. The Magnifier appears as a small window which is displayed at the top left corner with a glass magnifier image and with two buttons to increase and decrease the screen magnification as displayed below.

Magnifier Tool of Windows 8

Magnifier Tool of Windows 8

Once the Magnifier is running, the screen area displayed would be near to the mouse cursor. Effectively wherever you mouse cursor moves, the visible area would be around that mouse cursor location and the magnification can be increased or decreased from the buttons on the magnifier tool window.

The above magnification is effective as long as the Windows 8 Magnifier tool is running and magnifying the screen. The only drawback is that only portion of the screen will be visible and text will appear as sort of blurred as in the above screenshot of Windows 8 Magnifier tool Window. In case you would like to magnify whatever you are browsing in a browser window, there is a shortcut way to do that and is effective as well. Hold the Ctrl Key and Scroll the Mouse Wheel to increase or decrease the Magnification applicable to your browser window. This can be really useful when you are browsing a website which occupies only a portion of your monitor.

In case you need magnification for doing a presentation on a projector or even on a monitor with big resolution, you can change the appearance and size of your mouse cursor with Daanav Mouse Cursor which allows you to define your own bitmap image around the mouse cursor. By default the Daanav Mouse Cursor displays a red colored circle around mouse cursor which can be really effective in portraying where you want your audeince attention.