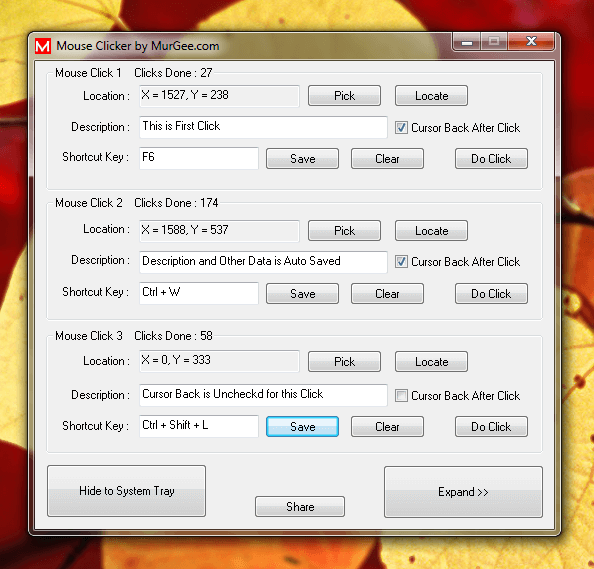
Screen of a Windows Computer is totally controllable using Windows Control Panel. Yes the Windows Control Panel allows you to control what colors and how content is displayed on your Screen by Microsoft Windows. The Display Settings from Windows Control Panel provides major control over display of everything on your Windows Computer. This Post talks about controlling Display Color, Resolution, Monitor Settings, etc. The Example Windows Computer taken in this post is a Windows 7 Computer and the description and other settings are almost the same on Windows Vista as well. Microsoft Windows 8 has taken a big step ahead and another post will describe how to control Display Settings in a Windows 8 or Windows 8.1 Computer.
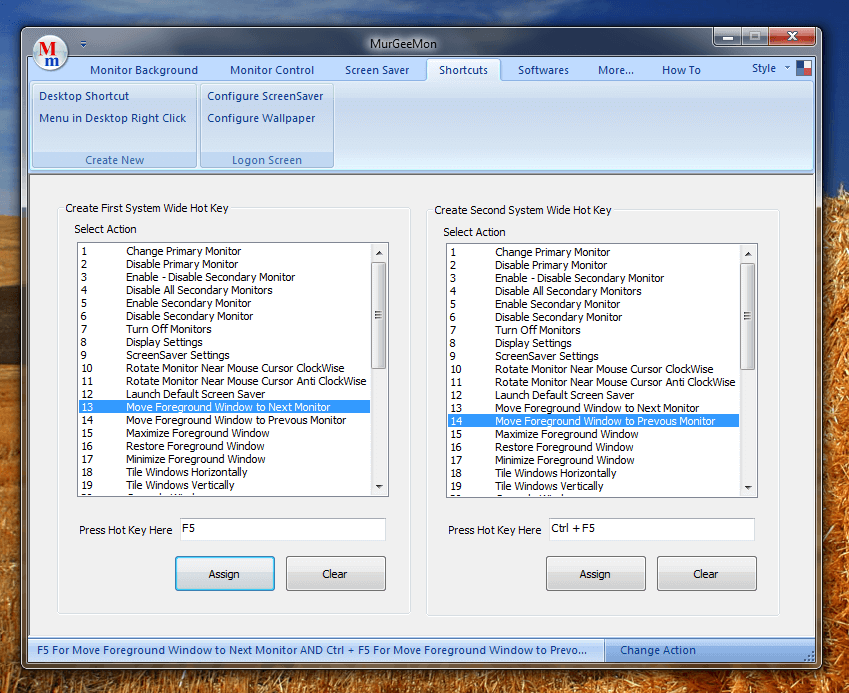
Screen Resolution Shortcut On Desktop
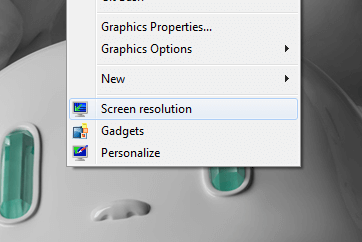
Let’s Start by doing a Right Click on Desktop and Invoke the Right Click menu of Desktop. Note that there is are Menu Options to Launch Screen Resolution, Gadgets and Personalize. The Screen Resolution Menu Option will open up the Screen Resolution Page of Control Panel. Yes you can Launch the Screen Resolution Page in many other ways, however invoking Screen Resolution from Right Click of Desktop Menu is the Simplest option.
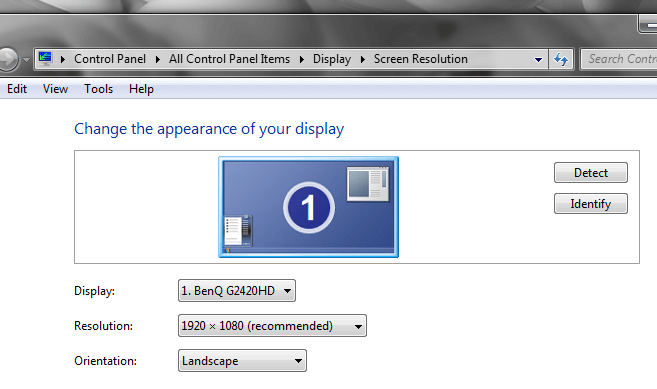
Screen Resolution in Control Panel
The Screen Resolution page of Control Panel allows you to Control the Display Resolution and hence affects how your Screen Display Appears. Long Time back when Windows XP was the best Windows Operating System, Computer Engineers often had to struggle with Display Drivers and assigning appropriate Display Resolution. Now a days with Windows 7, Windows 8, and Windows 8.1, normally the Display Resolution is assigned by the Windows Operating System Installer already and is the best Display Resolution for the Screen connected. Even if you do have Multiple Screens Connected to your Windows Computer, this Screen Resolution page of Windows Control Panel is the page where you can control what does the screen of other connected monitors display. The post Second Screen in Windows 8 talks briefly how you can Control Dual Monitors on a Windows 8 Computer. As evident from the Screenshot above, you can view or change Display Resolution, Orientation and even detect the Monitor(s) connected to your Windows Computer.
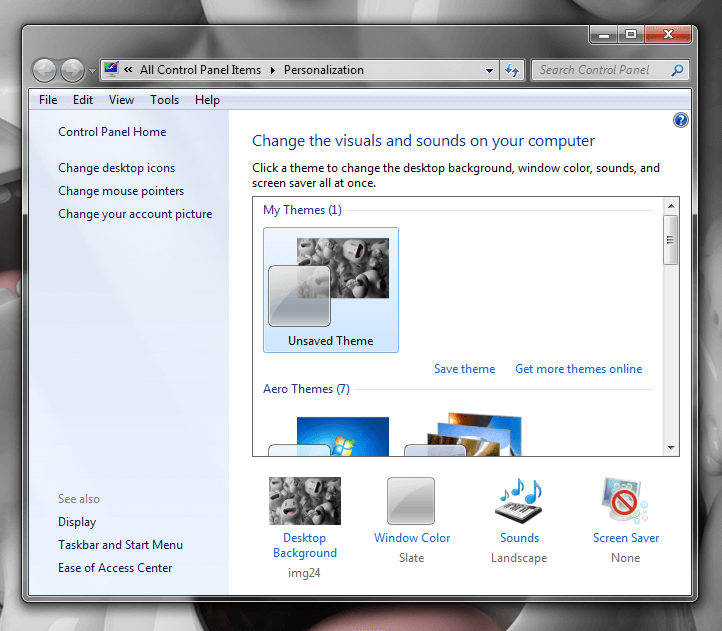
Personalization in Windows Control Panel
The Personalization page of Windows Control Panel allows you to change Desktop Background, Color of Windows , Transparency of Windows, Screen Saver, etc. Few Image Files for Desktop Background are provided by Microsoft in every Windows Operating System and you can even download Picture Files called as Wallpapers and assign them to Desktop Background Image. Windows 8 provides easy way to Assign Different Wallpapers on to different Screens / Monitors. In case you do have Dual Monitors Connected to your Windows 7 Computer, you can use the Dual Monitor Software to assign different Wallpapers to Dual Monitors. The availability of LCD Monitors with Bigger Screen Resolution allows everybody to have a Bigger Monitor as Compared to having Dual Monitors an easy way to manage Large Content on Display.
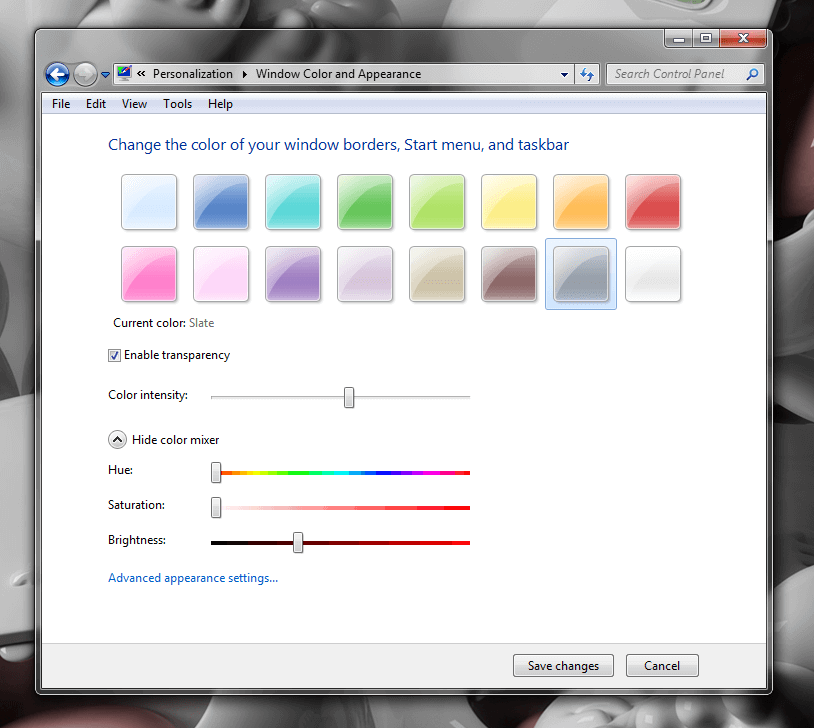
Window Color And Appearance
The Window Color Option is an important aspect and settings in Window Color affect all Application Windows. The Screenshot above displays the Window Color Page of Windows Control Panel where you can control the color of Application Windows, Enable / Disable Transparency of Application Windows and fully control the Colors of Application Windows. Software Applications like Color Change Detector as used in Auto Color Clicker allows you to create a Screen Sensor with which you can Monitor Screen Color Changes and launch Applications or Open Document Files. The Screen Color Changes done in the Window Color and Appearance Control Panel option are applicable to Window borders, Start menu and taskbar.
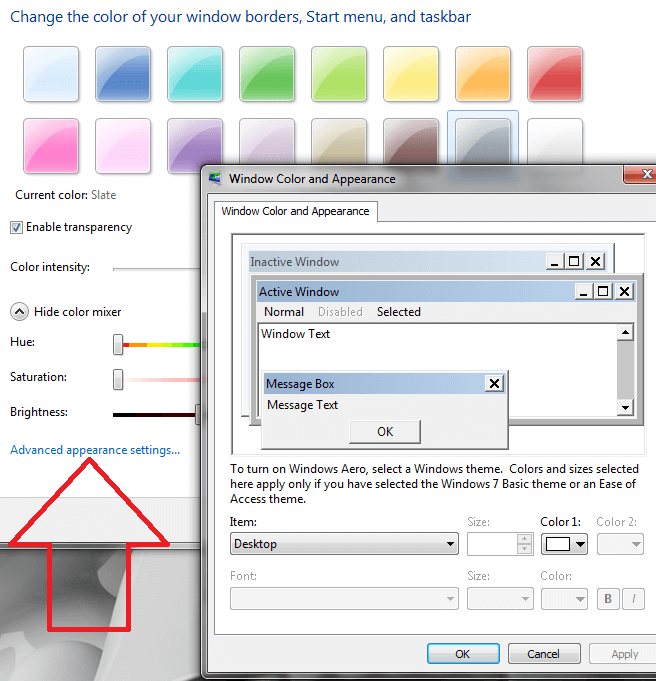
Advanced appearance settings in Windows
The above Screenshot displays Advanced appearance Settings in which you can control color and font of specific display item. In case you do have specific requirement then this advanced setting of appearance can give you specific color. In order to change color / font of let’s say how Message Box appear, click on the Message Box and then choose the appropriate Color and Font. The Font option is enabled as and when it is applicable for the selected display item.
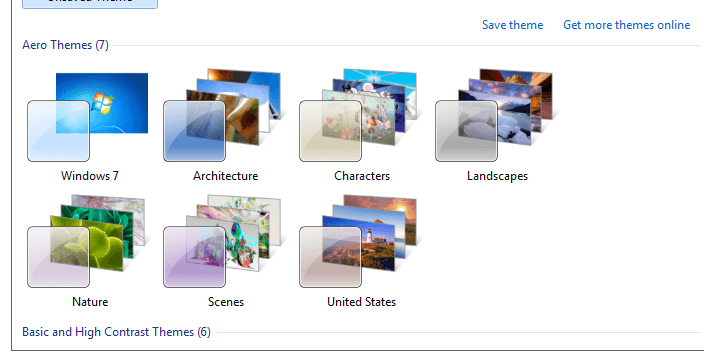
Display Theme for Changing Screen Color and other Settings
All the above Control Panel features together gives you the Screen Color as you desire. In case you want to change Screen Color, Desktop Background and other Screen Appearance settings, then selection of a different theme can be an easy way to change the overall look of your Windows Computer. As displayed in the above Personalization tab of Windows Control Panel, you can connect to Internet and Download more themes from Internet or use any of the pre-installed themes to change the Screen Color and other Settings of your Windows PC.