This post explains how to delete the Application History in Windows 8 operating system on your PC. Whenever you close the Windows 8 Style Application in Microsoft Windows 8, on rare occasions it happens that it gets paused instead of closing completely. This enables you to switch between applications instead of launching an application from the start. The steps given below explains you how to go ahead and delete the Application history in Windows 8.
1) Open the “Setting Panel”. You can do this by using the combination of Windows key with “I” key i.e Windows+I. A side bar appears on the right side of your screen( Setting Panel). Click on the “Change PC settings” button displayed at the bottom of the “Settings Panel”.
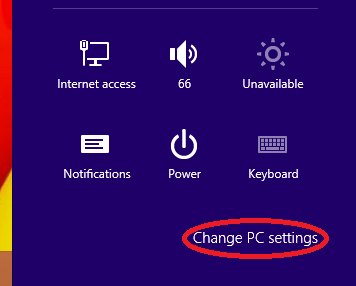
Settings Panel in Windows 8
2) After selecting “Change PC settings”, the screen will switch to PC Settings Panel. Click on “General” from the list of option in PC settings panel. When you select “General”, on the right hand side you will be able to see different options. Under “App switching”, you will be able to see “Delete History” button marked in red circle as shown in the Screenshot below. Click on “Delete History” button.

How to Delete Application History in Windows 8
3) After you click on “Delete History” button, you will see a Confirmation saying “Done” next to it as you can see in the Screenshot given above. This is all about it. You can also follow the procedure in this post to access the “General” category of “PC settings panel” which is used to “View the Used Space by Windows 8 Applications” that we have posted previously.